Stenciling Techniques for Home Decor

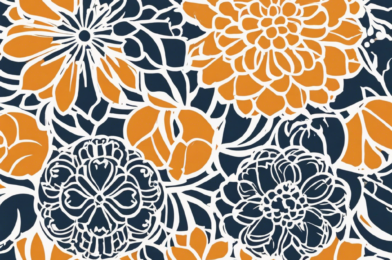
Stenciling techniques offer a versatile and creative way to enhance your home decor. By using stencils, you can add personalized touches to your walls, furniture, and other surfaces with ease. Whether you’re a beginner or a seasoned DIY enthusiast, mastering stenciling techniques can bring a new dimension to your home design projects.

One of the key factors in successful stenciling is choosing the right materials. Opt for high-quality stencils made of durable materials such as mylar or plastic. These materials are easy to clean and maintain, ensuring that your stencils will last for multiple uses. Additionally, invest in good quality stencil brushes to achieve crisp and clean lines in your designs.

Before you start stenciling, it’s important to prepare your surface properly. Clean the surface thoroughly to remove any dust or debris that could affect the stencil’s adhesion. If you’re stenciling walls, consider using painter’s tape to secure the stencil in place and prevent any shifting during the painting process.

When it comes to paint selection, choose a high-quality acrylic or latex paint for stenciling projects. These types of paint work well on a variety of surfaces and offer good coverage. Remember to apply the paint in thin, even layers to prevent bleeding under the stencil and achieve professional-looking results.

Experiment with different stenciling techniques to create unique effects in your home decor. Try layering stencils for a dimensional look, or use a stippling technique to add texture to your designs. You can also play with color combinations to create visually stunning patterns and motifs that reflect your personal style.

If you make a mistake while stenciling, don’t worry! There are ways to fix it. You can use a damp cloth or sponge to quickly wipe away any excess paint before it dries. For more stubborn mistakes, consider using a small artist’s brush to touch up the area with matching paint.

After you’ve finished stenciling, allow the paint to dry completely before removing the stencil. Carefully peel back the stencil to reveal your masterpiece underneath. If you’re stenciling a larger area, work in sections to ensure that the paint doesn’t smudge or smear as you move across the surface.

In conclusion, stenciling techniques can be a fun and rewarding way to elevate your home decor. With the right materials, preparation, and techniques, you can transform your living space with custom designs that reflect your individual taste and style. Get creative, experiment with different patterns and colors, and enjoy the process of stenciling as you create a truly unique home environment.
DIY Lighting Projects

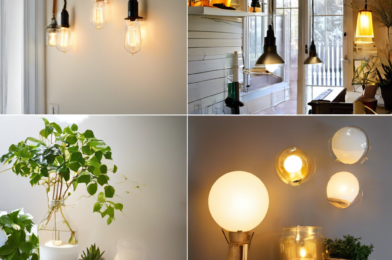
DIY Lighting Projects can bring a touch of creativity and personality to your home. Whether you’re looking to add ambiance to a specific room or enhance the overall aesthetic of your living space, DIY lighting projects offer a fun and cost-effective way to achieve your goals. From simple and stylish lamp upgrades to unique and eye-catching light fixtures, there are endless possibilities to explore. In this article, we’ll delve into eight DIY lighting projects that can inspire you to illuminate your home in a whole new light.

One popular DIY lighting project is creating your own pendant lights. By repurposing materials such as mason jars, wire baskets, or even old wine bottles, you can craft unique and stylish pendant lights that will become conversation starters in any room. These custom pendant lights can be hung above kitchen islands, dining tables, or in cozy reading nooks to add a touch of charm and personality to your space.

Another creative DIY lighting project involves making your own lighted marquee sign. Using plywood, string lights, and a bit of artistic flair, you can design and construct a custom marquee sign that showcases your favorite quote, word, or symbol. Whether you hang it in your living room as a statement piece or use it to add a playful touch to a home office or bedroom, a DIY marquee sign is sure to brighten up any space.

For those looking to add a touch of nature to their lighting décor, creating a DIY branch chandelier can be a great option. By collecting branches or driftwood and wrapping them with fairy lights or LED strips, you can craft a stunning and organic chandelier that brings a warm and rustic vibe to your home. Hang your branch chandelier in a dining room, entryway, or outdoor patio to create a cozy and inviting atmosphere.

If you’re a fan of industrial design, DIY pipe lamps might be the perfect lighting project for you. By assembling pipes, fittings, and a light socket kit, you can create a sleek and modern industrial-style lamp that adds a touch of urban chic to your home décor. Whether you place it on a desk, nightstand, or bookshelf, a DIY pipe lamp is a stylish and functional lighting solution that can complement a variety of interior styles.

Adding a touch of whimsy to your home can be as easy as creating DIY cloud lights. Using cotton batting, paper lanterns, and LED string lights, you can craft fluffy and magical cloud lights that bring a dreamy ambiance to any room. Hang them in a nursery or playroom to create a cozy and enchanting atmosphere that will spark joy and imagination in both children and adults alike.

For those looking to upcycle old items into new treasures, creating DIY upcycled lampshades can be a fun and eco-friendly lighting project. By repurposing materials such as old books, newspapers, or fabric scraps, you can design and construct one-of-a-kind lampshades that add a touch of vintage charm to your home. These upcycled lampshades can be used on table lamps, floor lamps, or pendant lights to infuse your space with character and creativity.

If you’re a fan of minimalist and Scandinavian design, creating a DIY wooden pendant light can be a simple yet elegant lighting project to undertake. With just a wooden dowel, a pendant light kit, and some basic woodworking skills, you can craft a chic and understated pendant light that adds a warm and natural touch to your home. Hang your wooden pendant light above a dining table or in a cozy reading corner to create a serene and inviting atmosphere.

Lastly, for those who enjoy a touch of vintage glamour, creating a DIY crystal chandelier can be a dazzling lighting project to tackle. By using crystal beads, wire, and a chandelier frame, you can design and assemble a sparkling crystal chandelier that exudes elegance and sophistication. Hang it in a formal dining room, grand foyer, or even a walk-in closet to add a touch of luxury and glamour to your home décor.

In conclusion, DIY lighting projects offer a creative and budget-friendly way to illuminate your home with style and personality. Whether you’re a fan of rustic charm, industrial chic, whimsical accents, or minimalist elegance, there’s a DIY lighting project out there to suit your taste and décor preferences. So roll up your sleeves, gather your materials, and let your creativity shine as you embark on these eight DIY lighting projects to transform your home into a beautifully lit sanctuary.

Sewing Projects for Home Decor

Sewing projects for home decor are a fantastic way to add a personal touch to your living space. Whether you’re a seasoned seamstress or just starting out, there are plenty of creative and simple projects to try. From throw pillows to curtains, table runners to wall hangings, the possibilities are endless. In this article, we’ll explore some exciting sewing projects that can elevate your home decor and showcase your unique style.

One of the easiest sewing projects for home decor is making throw pillows. With a few pieces of fabric, some stuffing, and basic sewing skills, you can create custom pillows that complement your furniture and color scheme. Choose fabrics that match your existing decor or opt for bold patterns to make a statement.

If you’re looking to add a touch of elegance to your windows, consider sewing your own curtains. Custom curtains can be tailored to fit your windows perfectly and can be made in any fabric you desire. Whether you prefer sheer panels for a light and airy look or heavy drapes for added privacy, sewing your own curtains allows you to customize your window treatments to suit your style.

Table runners are another fun and functional sewing project for home decor. A handmade table runner can add a pop of color to your dining room or kitchen table and is a great way to showcase your sewing skills. Choose a fabric that complements your dinnerware and experiment with different lengths and widths to find the perfect fit for your table.

Wall hangings are a creative way to add texture and visual interest to your walls. Whether you opt for a fabric tapestry, a quilted wall hanging, or a simple fabric hoop art piece, sewing your own wall decor allows you to personalize your space and showcase your creativity. Mix and match fabrics, colors, and patterns to create a unique piece that reflects your personality.

For those looking to add a touch of whimsy to their home decor, consider sewing your own decorative cushions. Whether you choose to make animal-shaped cushions for a child’s room or quirky accent cushions for your living room, sewing custom cushions allows you to inject personality and charm into your space. Experiment with different shapes, sizes, and embellishments to create one-of-a-kind cushions that make a statement.

If you’re feeling ambitious, consider sewing a quilt for your home decor. Quilting is a time-honored craft that allows you to create heirloom-quality pieces that can be passed down through generations. Whether you opt for a traditional patchwork design or a modern geometric pattern, quilting is a rewarding sewing project that can add warmth and personality to your home.

Another creative sewing project for home decor is making fabric baskets or bins. These versatile storage solutions can help you organize clutter in style. Use coordinating fabrics to create a set of nested baskets for storing small items or make a fabric bin to hold magazines, toys, or blankets. Sewing your own storage solutions allows you to customize the size and shape to fit your needs.

In conclusion, sewing projects for home decor offer a fun and rewarding way to personalize your living space. Whether you’re a beginner or an experienced seamstress, there are plenty of creative projects to try. From throw pillows to curtains, table runners to wall hangings, the possibilities are endless. So grab your sewing machine, pick out some fabulous fabrics, and get ready to add a touch of handmade charm to your home.

DIY Wall Art Ideas

Looking to spruce up your walls with a touch of creativity? DIY wall art is a fantastic way to personalize your space and showcase your artistic flair. With a little imagination and some basic materials, you can transform your walls into stunning works of art. Whether you’re a seasoned crafter or a newbie to the DIY scene, there are plenty of ideas to inspire you. Here are some DIY wall art ideas to get your creative juices flowing.

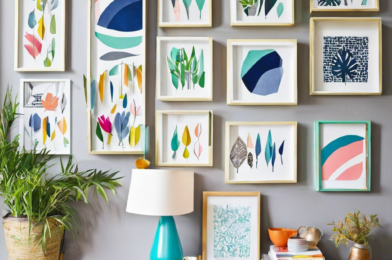
One simple yet effective DIY wall art idea is creating a gallery wall. Gather a collection of your favorite photos, prints, and artwork, and arrange them in a visually appealing layout on your wall. You can mix and match different frame styles and sizes for an eclectic look, or keep it cohesive with matching frames. This versatile and customizable option allows you to showcase your personal style and memories in a unique way.

If you’re feeling particularly crafty, why not try your hand at creating your own abstract canvas art? All you need is a canvas, some acrylic paints, and a brush. Experiment with different colors, textures, and techniques to create a one-of-a-kind piece that reflects your personality. Abstract art is all about expressing emotions and ideas through shapes and colors, so don’t be afraid to let your creativity run wild.

For a more nature-inspired touch, consider making a botanical wall hanging. Gather some dried flowers, branches, and twine, and arrange them in a visually pleasing composition. This organic and rustic wall art piece will bring a touch of the outdoors into your home and add a unique focal point to your space. You can even experiment with different botanical elements to create a seasonal display that changes throughout the year.

Feeling nostalgic? Upcycle old vinyl records into a retro-inspired wall art piece. Paint the records in bold colors or patterns, or leave them as is for a vintage look. Arrange them on your wall in a pattern or cluster for a funky and playful display that pays homage to the music of yesteryears. This DIY project is not only eco-friendly but also adds a touch of retro charm to your space.

If you’re a fan of geometric design, consider creating a geometric wall mural using painter’s tape and paint. Tape off geometric shapes on your wall and fill them in with different colors to create a modern and eye-catching focal point. This DIY project is perfect for adding a contemporary touch to your space and can easily be customized to suit your color scheme and aesthetic preferences.

For a more whimsical and playful vibe, why not try your hand at creating a string art masterpiece? All you need is a wooden board, nails, and colorful string. Hammer the nails into the board in a pattern or design of your choice, and then wrap the string around the nails to create a unique and textured wall art piece. String art is a fun and interactive DIY project that allows you to unleash your inner artist.

If you’re a fan of typography and inspirational quotes, consider creating a DIY quote wall art piece. Write out your favorite quote or phrase on a canvas or piece of wood using stencils or freehand, and embellish it with paint or markers. This personalized wall art piece will not only add a motivational touch to your space but also serve as a daily reminder of your values and aspirations.

Finally, for a minimalist and modern touch, consider creating a black and white photo collage wall. Print out a collection of black and white photos in varying sizes and frame them in simple black or white frames. Arrange them on your wall in a grid or asymmetrical layout for a chic and sophisticated gallery wall that adds a touch of elegance to your space. This timeless and classic DIY wall art idea is perfect for those who prefer a more understated aesthetic.

In conclusion, DIY wall art is a fantastic way to add personality and charm to your space while showcasing your creativity and style. Whether you’re a seasoned crafter or a DIY newbie, there are plenty of ideas to inspire you to create your own stunning wall art pieces. From gallery walls to abstract canvases to nature-inspired creations, the possibilities are endless. So roll up your sleeves, grab your materials, and let your imagination run wild as you embark on your DIY wall art journey.

Painting Techniques for DIY Projects

Painting Techniques for DIY Projects

Are you looking to spruce up your living space with a fresh coat of paint? DIY painting projects can be a fun and cost-effective way to give your home a makeover. Whether you’re a beginner or a seasoned DIY enthusiast, mastering the right painting techniques can make a world of difference in the outcome of your project. In this article, we’ll explore some essential painting techniques that will help you achieve professional-looking results in your DIY endeavors.

Preparation is key when it comes to painting projects. Before you even pick up a paintbrush, make sure to properly prepare the surface you’ll be painting. This includes cleaning the surface to remove any dirt, dust, or grease that could affect the adhesion of the paint. Additionally, fill in any holes or cracks with spackling compound and sand down rough areas to create a smooth canvas for your paint. Proper preparation ensures that your paint will adhere well and result in a flawless finish.

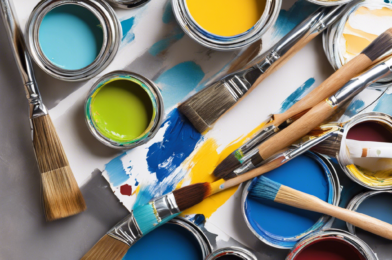
Choosing the right paint and tools is crucial for a successful painting project. Select high-quality paints that are appropriate for the surface you’ll be painting, whether it’s walls, furniture, or trim. Consider the finish you desire – matte, eggshell, satin, or glossy – and choose paint accordingly. Invest in quality brushes and rollers to ensure smooth and even application of paint. Don’t forget to use painter’s tape to protect areas you don’t want to paint, such as trim, ceilings, and floors. Investing in the right materials will make the painting process easier and more enjoyable.

One of the most important painting techniques to master is proper brush and roller usage. When using a brush, dip only one-third of the bristle length into the paint to avoid overloading it. Start painting with light, even strokes, working in the direction of the wood grain or the shape of the surface. For larger areas, a roller can provide a more uniform finish. Roll the paint in a zig-zag pattern to evenly distribute it, then lightly roll over the surface in one direction for a smooth and consistent coat. Practice using both brushes and rollers to determine which works best for different areas of your project.

Achieving clean and straight lines is essential for a professional-looking paint job. To prevent paint from bleeding under painter’s tape, make sure to press down firmly on the tape to create a tight seal. Remove the tape while the paint is still wet to avoid peeling off dried paint along with the tape. For corners and edges, use a small brush or an angled brush to carefully cut in the paint for sharp lines. Take your time and work methodically to ensure precise edges and a polished finish.

Layering paint properly is key to achieving a smooth and durable finish. Allow each coat of paint to dry completely before applying the next one. Lightly sand between coats with fine-grit sandpaper to remove any imperfections and ensure better adhesion of subsequent layers. For a more professional finish, consider applying a primer before painting, especially on bare surfaces or when making drastic color changes. Building up thin layers of paint will result in a more even and long-lasting finish that will stand the test of time.

Experimenting with different painting techniques can add depth and texture to your DIY projects. Try techniques like color washing, sponge painting, or stippling to create unique and interesting effects on your walls or furniture. Use stencils to add patterns or designs to your surfaces, or create a distressed look by sanding through layers of paint. Don’t be afraid to get creative and try out new techniques – you might discover a style that truly speaks to you and enhances the overall look of your space.

Finishing touches can elevate your painting project from good to great. Once the paint has dried completely, remove any painter’s tape and touch up any imperfections with a small brush. Clean your brushes and rollers thoroughly with soap and water or the appropriate solvent to keep them in good condition for future projects. Reinstall any hardware or trim that was removed before painting, and step back to admire your handiwork. Take pride in your DIY accomplishments and enjoy the transformation you’ve made to your living space through the power of paint.

In conclusion, mastering painting techniques for DIY projects can turn your home improvement endeavors into works of art. By properly preparing surfaces, choosing the right materials, using brushes and rollers effectively, achieving clean lines, layering paint correctly, experimenting with different techniques, and adding finishing touches, you can create professional-looking results that showcase your creativity and style. So, roll up your sleeves, grab your paintbrush, and let your imagination run wild as you embark on your next DIY painting adventure. Your home will thank you for it!

Beginner’s Guide to DIY Home Decor

Are you looking to add a personal touch to your living space but don’t know where to start? DIY home decor is a fantastic way to infuse your personality into your surroundings without breaking the bank. Whether you’re a seasoned DIY enthusiast or just starting out, this beginner’s guide will walk you through some simple and creative ideas to transform your home. Let’s dive into the world of DIY home decor and unleash your inner designer!

The first step in any DIY project is to gather inspiration. Take some time to browse through home decor magazines, websites, or social media platforms like Pinterest for ideas. Create a mood board or folder to collect images and color schemes that resonate with you. This will help you narrow down your style preferences and guide you in selecting DIY projects that match your taste.

Once you have your inspiration sorted, it’s time to assess your space. Take a good look around your home and identify areas that could use a little sprucing up. Whether it’s a blank wall, outdated furniture, or a dull corner, pinpointing these areas will give you a starting point for your DIY projects. Remember, even small changes can make a big impact on the overall look and feel of a room.

Now that you have a clear idea of what you want to achieve, it’s time to roll up your sleeves and get creative. DIY home decor can range from simple projects like creating your own artwork or repurposing existing items to more complex endeavors like building furniture from scratch. Start with easy projects to build your confidence before tackling more challenging ones. Remember, the key is to have fun and enjoy the process.

One of the most budget-friendly ways to update your home decor is by upcycling items you already own. Whether it’s giving old furniture a fresh coat of paint, repurposing jars into decorative vases, or turning wine corks into coasters, the possibilities are endless. Upcycling not only saves you money but also adds a unique touch to your decor that store-bought items can’t replicate.

If you’re feeling crafty, consider adding handmade elements to your home decor. DIY projects like macrame wall hangings, hand-painted plant pots, or customized throw pillows can add a personal touch to your space. Don’t be afraid to experiment with different materials and techniques to find what works best for you. Handmade items not only showcase your creativity but also make your home feel more inviting and cozy.

As you embark on your DIY home decor journey, don’t forget the power of color and texture. Adding pops of color through accent walls, throw pillows, or rugs can instantly liven up a room. Experiment with different textures like faux fur, woven baskets, or metallic accents to create depth and visual interest. Mixing and matching colors and textures can transform a dull space into a vibrant and stylish oasis.

Finally, don’t be afraid to make mistakes and learn along the way. DIY home decor is all about experimentation and personal expression. If a project doesn’t turn out as expected, see it as an opportunity to refine your skills and try again. Remember, the beauty of DIY is that you have the freedom to create a home that reflects your unique style and personality. So, gather your supplies, unleash your creativity, and start transforming your space one DIY project at a time!